Tic-Tac-Toe Game with TinyML Digit Recognition
You’ve undoubtedly come across a very common kids’ game, Tic-Tac-Toe, also known as (Xs and Os). But what if you can play it on a smart interface, instead of the traditional paper-and-pencil method? For this project, Rucksikaa Raajkumar, a developer and blogger, came up with an idea to implement the Tic-Tac-Toe game on M5Stack Core using TinyML techniques.
Overview
This handwritten digit recognition experiment was inspired by the popular MNIST dataset.
The idea is to draw the position number on a smart interface and the respective mark is to be placed on the specified position in the 3 x 3 grid. The handwritten digit would be predicted by a machine learning model and the model's output would be passed on to the program.
 A game for this experiment was created using Tkinter and Python. For the implementation of how Xs and Os will be drawn, M5Stack Core 2 ESP32 IoT Development Kit and Neuton TinyML are used.
Data Collection
For a proper collection of training and test datasets, M5Stack Core is used. We decided to assign 75% of the data as the training dataset and the remaining 25% as the test dataset.
The target variable of the training dataset is 'Label' (it will contain the position number). The position number ranges from 1 to 9, inclusive.
Since each person writes numbers differently, each number should be drawn out in all possible ways to collect sufficient samples for each way. All in all, 200 samples for each digit were collected, 150 of which belonged to the training dataset and 50 of which to the test dataset. Also, we narrowed down feature variables to 255 (instead of the 784 feature variables that are contained in the MNIST training dataset), because we won't draw digits over the whole screen.

Neuton TinyML requires uploading of datasets in a CSV format, so we prepare the training and test datasets as CSV files.
Model Training
Upload your training dataset. There should not be duplicate rows or any missing values. The dataset will be validated and, if it meets all requirements, the platform will show a green tick and allow you to continue.
As the next step, specify the task type, choose the metric, and enable the TinyML model settings. We selected the Classification task type for this project, although you can allow the platform to identify the target metric and task type itself.
The target metric here is Accuracy. It calculates the error rate of the model predictions on the validation dataset and represents the model quality.
If you want to create tiny models for microcontrollers, enable the TinyML mode using the slider and select the needed model settings.
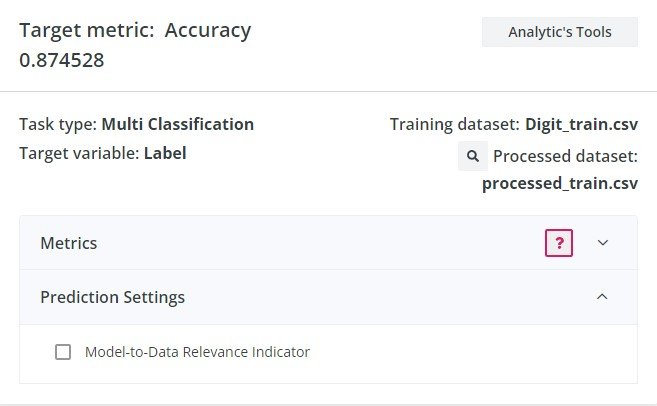
The quality of the model, its accuracy, and other analytics can be viewed once the training is complete. Our model had an accuracy of 87.5% and a model quality index of 88%.
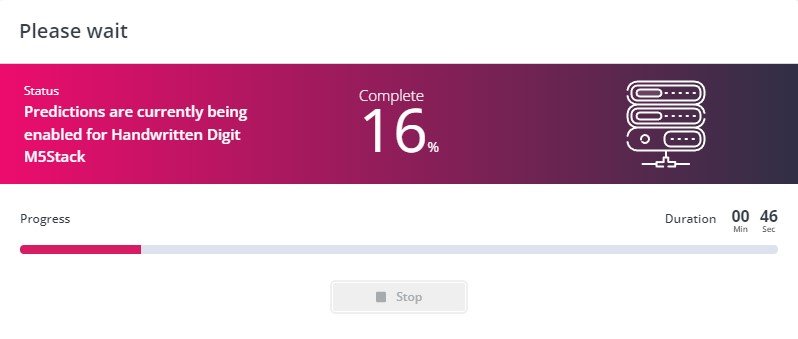
Prediction
To see how the model is performing, enable the prediction and use a test dataset. If you’re satisfied with your TinyML model, download the C library and deploy it on the M5Stack.
Embedding into M5Stack
An Arduino sketch file should be created to deploy the model. After downloading the C library, the zipped folder should be extracted and copied into the folder with the sketch file. Read the README text file within the downloaded content to learn how to embed the model.
According to the README file, the two main functions are:
- neuton_model_set_inputs – to set input values
- neuton_model_run_inference – to make predictions
You will need to make an array with model inputs. In this case, we used a buffer, as the input data type was not suitable for an array. Please make sure that the input count and order are the same as in the training dataset.
Python Application
The next step is to develop the Tic-Tac-Toe game and help our M5Stack "communicate" with the Python application.
The following libraries are needed for this project:
- Tkinter – standard GUI library for Python
- Serial – allows access to the serial port
- Time – used in this project to set delay periods
Here is a video with the final outcome of this project:
To read the detailed step-by-step description of all project steps and download codes, check out the full version by Rucksikaa Raajkumar.
Got inspired and want to create your own project? Try Neuton for free right now!